It's about exploring and sharing my creative adventures (mostly sewing these days) ~
~those activities that sometimes obsess, usually inspire, occasionally frustrate
~and always provide a delightful maze to wander through.

Monday, August 25, 2014

Dressing for Yoga (not actually DO-ing it...)

Yoga pants are a good start to a practice, yes?  No?   I used to practice yoga, once upon a time - semi-regularly, even, but now....well....how about if I just make a pair of yoga pants?

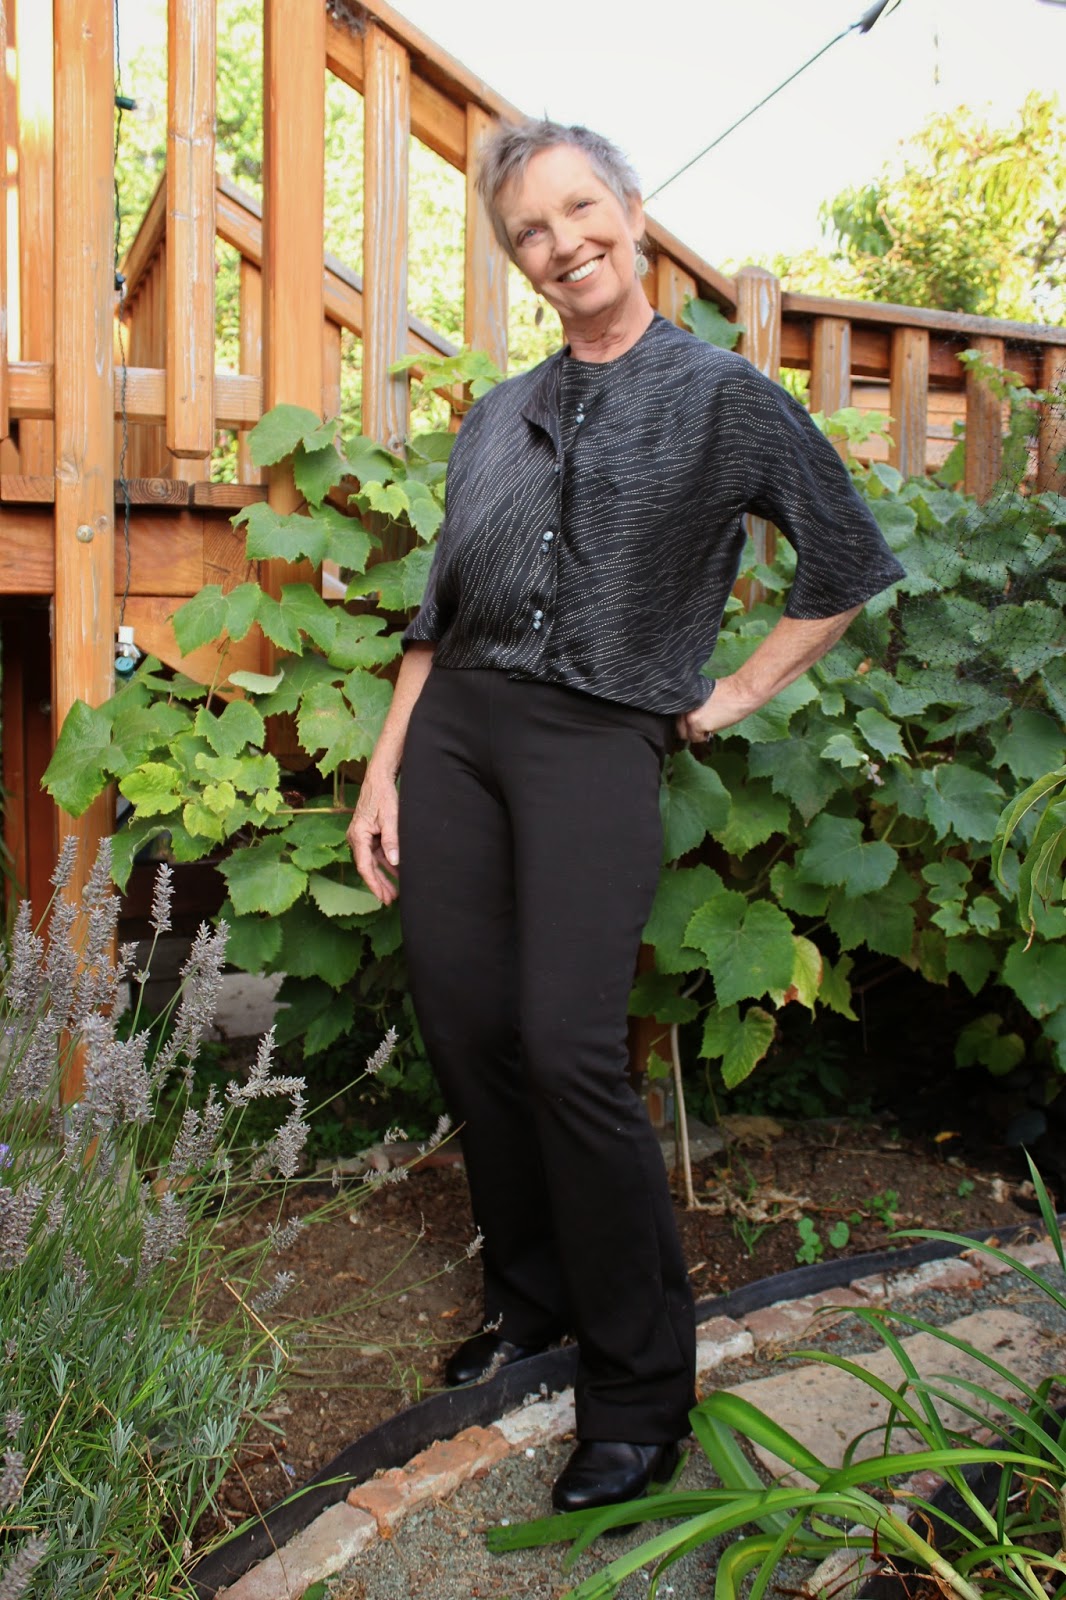
Style Arc's Becky Yoga pant

I have a number of Style Arc pants patterns, and absolutely love every pattern I've used!   Mine are all size 10, which fit well before I lost a few pounds this year, so I wasn't too sure about the fit of the yoga pants. When I laid a well-used pair of yoga pants on the flat pattern, it looked like the 10 would be a good fit though, so I cut them exactly per the pattern (even though all of my other SA 10's are currently a little bit on the loose side)

Thank goodness I didn't order a smaller size!   With the negative ease, coupled with a pretty sturdy and semi-stable knit, these pants are snug!   Very snug.  Snugger than I'm usually comfortable wearing, but with a long top they're great :::whew:::.   They were actually a perfect fit when I first made them, but I've gained back a few of those pounds on my healing journey, so now...well, did I mention how very snug they are?   A healthy dose of vanity makes me almost leery to post the pics, but here goes:


What I love about this pattern:


  • The now-famous Style Arc fit.  (weight loss & gain aside...)
  • Super quick & easy make!
  • One simple patch pocket, perfectly sized and placed.
  • Just the right amount of flare at the hemline.
  • Just the right width of the waistband.
What I dislike:

  • Ummmm......nothing?
There's really not a lot more to say.   This is, simply put, a simple and perfect yoga pant.  I'll make it again in a fabric with more give, which should give a slightly looser fit, and I'll probably make it again after that.   And again.   It's that perfect!

A note about the shoes I'm wearing - I went on a bit of a shoe-buying binge last January, and in order to bring an order up to the free shipping category, I added these Campers .    The link goes to gravitypope, and they still have this style!  By the way, if you keep your eye out, you can occasionally find a coupon sale for gravitypope, which will discount even the sale prices further - that's what I did & actually got a reasonable price.

Campers is a brand I've never had before, but it got great reviews, and for good reason!  Reeeeeally comfortable right out of the box.  And better than that, check out the motif!!!   Love love love!!!!
(pardon the garden dust - I could have cleaned them up before taking the pics, but...well... I didn't.)


Maybe I'll go do a little yoga.    

Tomorrow.

Sun salutations in the morning, anyone?

P.S.   For those who are wondering, I slept right through last night's 'quake, and nary a picture on the walls budged a bit.   I do know a few people north of the immediate Bay Area who experienced some damage and would appreciate some positive thoughts coming their way, but we've experienced far worse than this...and survived quite nicely :).

Saturday, August 23, 2014

Center For Pattern Design - Spiraling In Control!

The intrigue of the Center for Pattern Design's creativity absolutely captivates me!   When Sandra Ericson spoke at Canada College's Artistry In Fashion event last year I was hooked!   I bought 3 patterns, all inspired by Cristobal Balenciaga (a genius!).

My first make was the CB Bolero,  blogged here.   I have mixed feelings about this one, only because it's a little dressy for me, and also a little fidgity, so it doesn't really get that much wear.   The CB Spiral Blouse, however, is another matter - totally wearable, and in spite of the unusual design, it has a lot of possible ways to change it up.   Buttoned & closed, no buttons & open, drapey or stiffer fabric, collar, no collar, long or short sleeves - shams even made a knit top from it! 


One of the amazing aspects of Ericson's designs - her focus, really - is that she uses as few pattern pieces as possible & puts the seaming together in totally unique and ingenious ways.  The spiral top has one pattern piece, and if your fabric is wide enough, you can cut the entire top from ONE piece of fabric - rather mind-boggling, if you ask me!  I would take a pic of the pattern piece, but I have vague memories of someone getting in hot water for doing that, and I don't think it's fair or appropriate to the designer anyway.  Just trust me, it's impossible to imagine the finished product from the flat pattern piece without instructions - at least my brain certainly doesn't work that way!  The first time through I really stretched my mind muscles just figuring out how to put it together WITH instructions!

The description from the pattern: "This full scale pattern is fashioned after one demonstrated by Salvador who managed Monsieur Balenciaga’s tailoring atelier during the Golden Age of Couture in the mid-20th Century. It is a single bias-cut pattern piece which comprises the front, back and spiral sleeve of an easy fitting top. The back hangs in a cowl at the hip and there are no side or shoulder seams. It may be worn open or closed in front. Fits 8 - 16 with adjustments.
This pattern is is appropriate for intermediate or advanced skills."


The pattern itself comes in one size (Medium), and adjustments are made along 2 lines marked on the pattern piece. A muslin is recommended, since it's hard to tell how it will fit just looking at the pattern piece. The entire top is cut on the bias, so even if you have the sizing down in one fabric, another fabric may behave differently with a bias cut.

Step one is figuring out the layout of the pattern on your fabric.  With short sleeves, you might be able to use one solid piece of fabric.   With long sleeves, you probably will need a center back seam - it took me a bit of maneuvering to match things up & still fit it onto my (JUST big enough) piece of fabric!  In fact, Step #1 of the pattern instructions say, and I quote, "Study the pattern diagram carefully...."

Uh huh.

Instructions are fairly minimal.  To give you an idea, the last 2 steps are 
4. "Finish hems as you wish." and 
5.  "Finish CF closure as desired."

Be forewarned.  

Construction Notes:  Mark the dot at the underarm carefully (once you've figured out just where the underarm is...seriously, it does not make immediate sense!)   This dot you need.   The notches and other dots are handy more for placement guidelines than for exact seam matching.   These pics may (or may not) help:
 Matching the dots (tailor tacked with red thread) at underarm:

Biggify the pic and note that the notches do NOT match up.
This doesn't matter - as you sew the seam, just let the fabric come together where it wants to,
you can trim the bottom of the sleeve later.

The fabric I used was a yummy silk charmeuse, which worked great for this pattern.   I also used a thin cotton for my toile, which turned into a wearable piece (sorry, no pics of that one).   I've seen it made up in a number of different fabrics; the choice is very versatile!   The pattern calls for "softly woven wools, silks or cottons; wool or silk crepe, crepe-backed satin, silk velvet, georgette or chiffon, medium weight rayons and novelty fabrics with bias elasticity."   LOTS of choice here!

Here's how the center back comes together:

I decided to use double buttons and a single buttonhole with a bar tack in the center.
I started with a machine made bar tack, but ended up doing it by hand:


The finished piece:


The wind blew my collar into odd positions.   I'm way too lazy to redo another photo shoot, and if that's how it's going to lie, then so be it!  

I've already worn this one several times, and will likely make another version or 2 of it.  Love the fabric, love the design -  thumbs way up for this pattern!

Monday, August 18, 2014

Two Teasers and a Tutorial for a Flat Four-Strand Fabric Braid

I do have a few more finished objects to blog, but new projects are just more exciting, so if you can kindly bear with me through some teasers for what's coming up, I'll get to those FO's soon.  er or later....

Ignore the Teaser at the Top:


First up, I'm mixing four fabrics for a birthday present piece for my darling niece, who is SO much fun to sew for!   For one thing, she loves my work (play).   For another, she's a fabulous collaborator who comes up with some great ideas.  She wanted me to incorporate some braiding in her present, a technique I used on a previous piece for her.

I wanted to do a flat, four-strand braid, and had a bit of a hard time finding a tutorial for this that was both easy, and had a good-looking finished project, so I thought I might as well create my own tutorial.

First I created 4 tubes, using this handy-dandy little bodkinish sort of tool (does it have an actual name?  Anyone?)

The end has a loop and a pointed thingy on a hinge
(thingy is a valid technical term - you all know that, right?)

I cut my strips of fabric 1" wide, then folded and sewed the long edges for 1/4"+ tubes.
After sewing, I trimmed the excess seam allowance.
I used a combo of knits and wovens -  the 2  knits were super easy to turn;  
the batik (a quilting cotton) - not so much.
The polyester slinky was also a bit of a problem because the edges frayed so badly!
I cut all of the fabrics on either the cross or straight grain, depending on the stability of the fabric.
I  didn't have enough of any of the fabrics to cut them on the bias, but I really didn't want too much stretch in the finished piece (a braid, as shown below) anyway.
In most cases, I would recommend cutting the tube fabric on the bias.

After sewing the seam of the tube, I cut one end in a point and added some Fray Check to it.

You then push the bodkin thingy into the tube, and push the point through the fabric, 
about 1/4" from the tip of the fabric point.
With the knits, this is easy.   
With the wovens, I ended up snipping a teensy tiny hole in the fabric in order to push the metal point through.

Then you pull the fabric all the way through the inside of the tube, 
praying that the point of the bodkin won't lose its grip before you're done. 

Praying does not always work.

Constructing the Braid

Sew the 4 tubes together at one end, and pin them to a pinnable surface.
I've labeled them 1-4, from left to right.
As you weave, the position of the tubes will change, 
but the numbering of the tubes will always remain at 1-4, left to right.

 Bring Tube #4 over #3

Bring #1 UNDER #2, and OVER #3 (the new #3)
I find it easier to treat this as one move, rather than 2,
because you're really only moving one of the tubes.

And that's it!!!
Really.
All you do now is keep repeating the above 2 moves.
The new #4 goes over the new #3

#1 goes under #2 and over #3

Keep repeating this sequence,
and be sure to keep the tubes flat as you weave - don't fold them over so that the bottom becomes the top - the bottom of the tube (i.e., the part that is touching the table...or in this case the ironing board, will always stay on the bottom.


And when you run out of tubing or have reached your desired length, you're done!

I had NOT reached my desired length, so I had to add more tubes.   I folded under one end of the woven fabrics and inserted the other end inside the folded tube.   For the knits, I didn't bother folding under a hem; I just used fray check.  I didn't worry too much about appearance of the joined tubes, so instead of hand sewing them, I just attached them with a sturdy zig zag.


The semi-finished pieces:

It may take awhile before the reveal, since the recipient doesn't live nearby, so fittings will be few and far between.   I will say one thing - this is a totally self-drafted piece, creating something that isn't even remotely like anything I've made before, and if a pattern for something close to it exists, I haven't found it.   So wish me luck!

Back to the Teaser at the Top:

This is a GAWjuss cut of silk charmeuse - a remnant that I have less than a yard of, 54" wide.  One of my sewing groups recently had a little brain-storming session where people brought fabrics that had them stumped as to what to create with them.  My wonderfully creative friends came up with JUST the thing for this piece.   Stay tuned for the solution...  (what do you think you would do with it?)

Meanwhile, Happy Creating!